

Open the Knowledge Base
- Log into Polimorphic and click Knowledge Base in the left-hand menu.
- If you manage more than one organization, use the organization selector in the top-right corner of the page to switch between them.
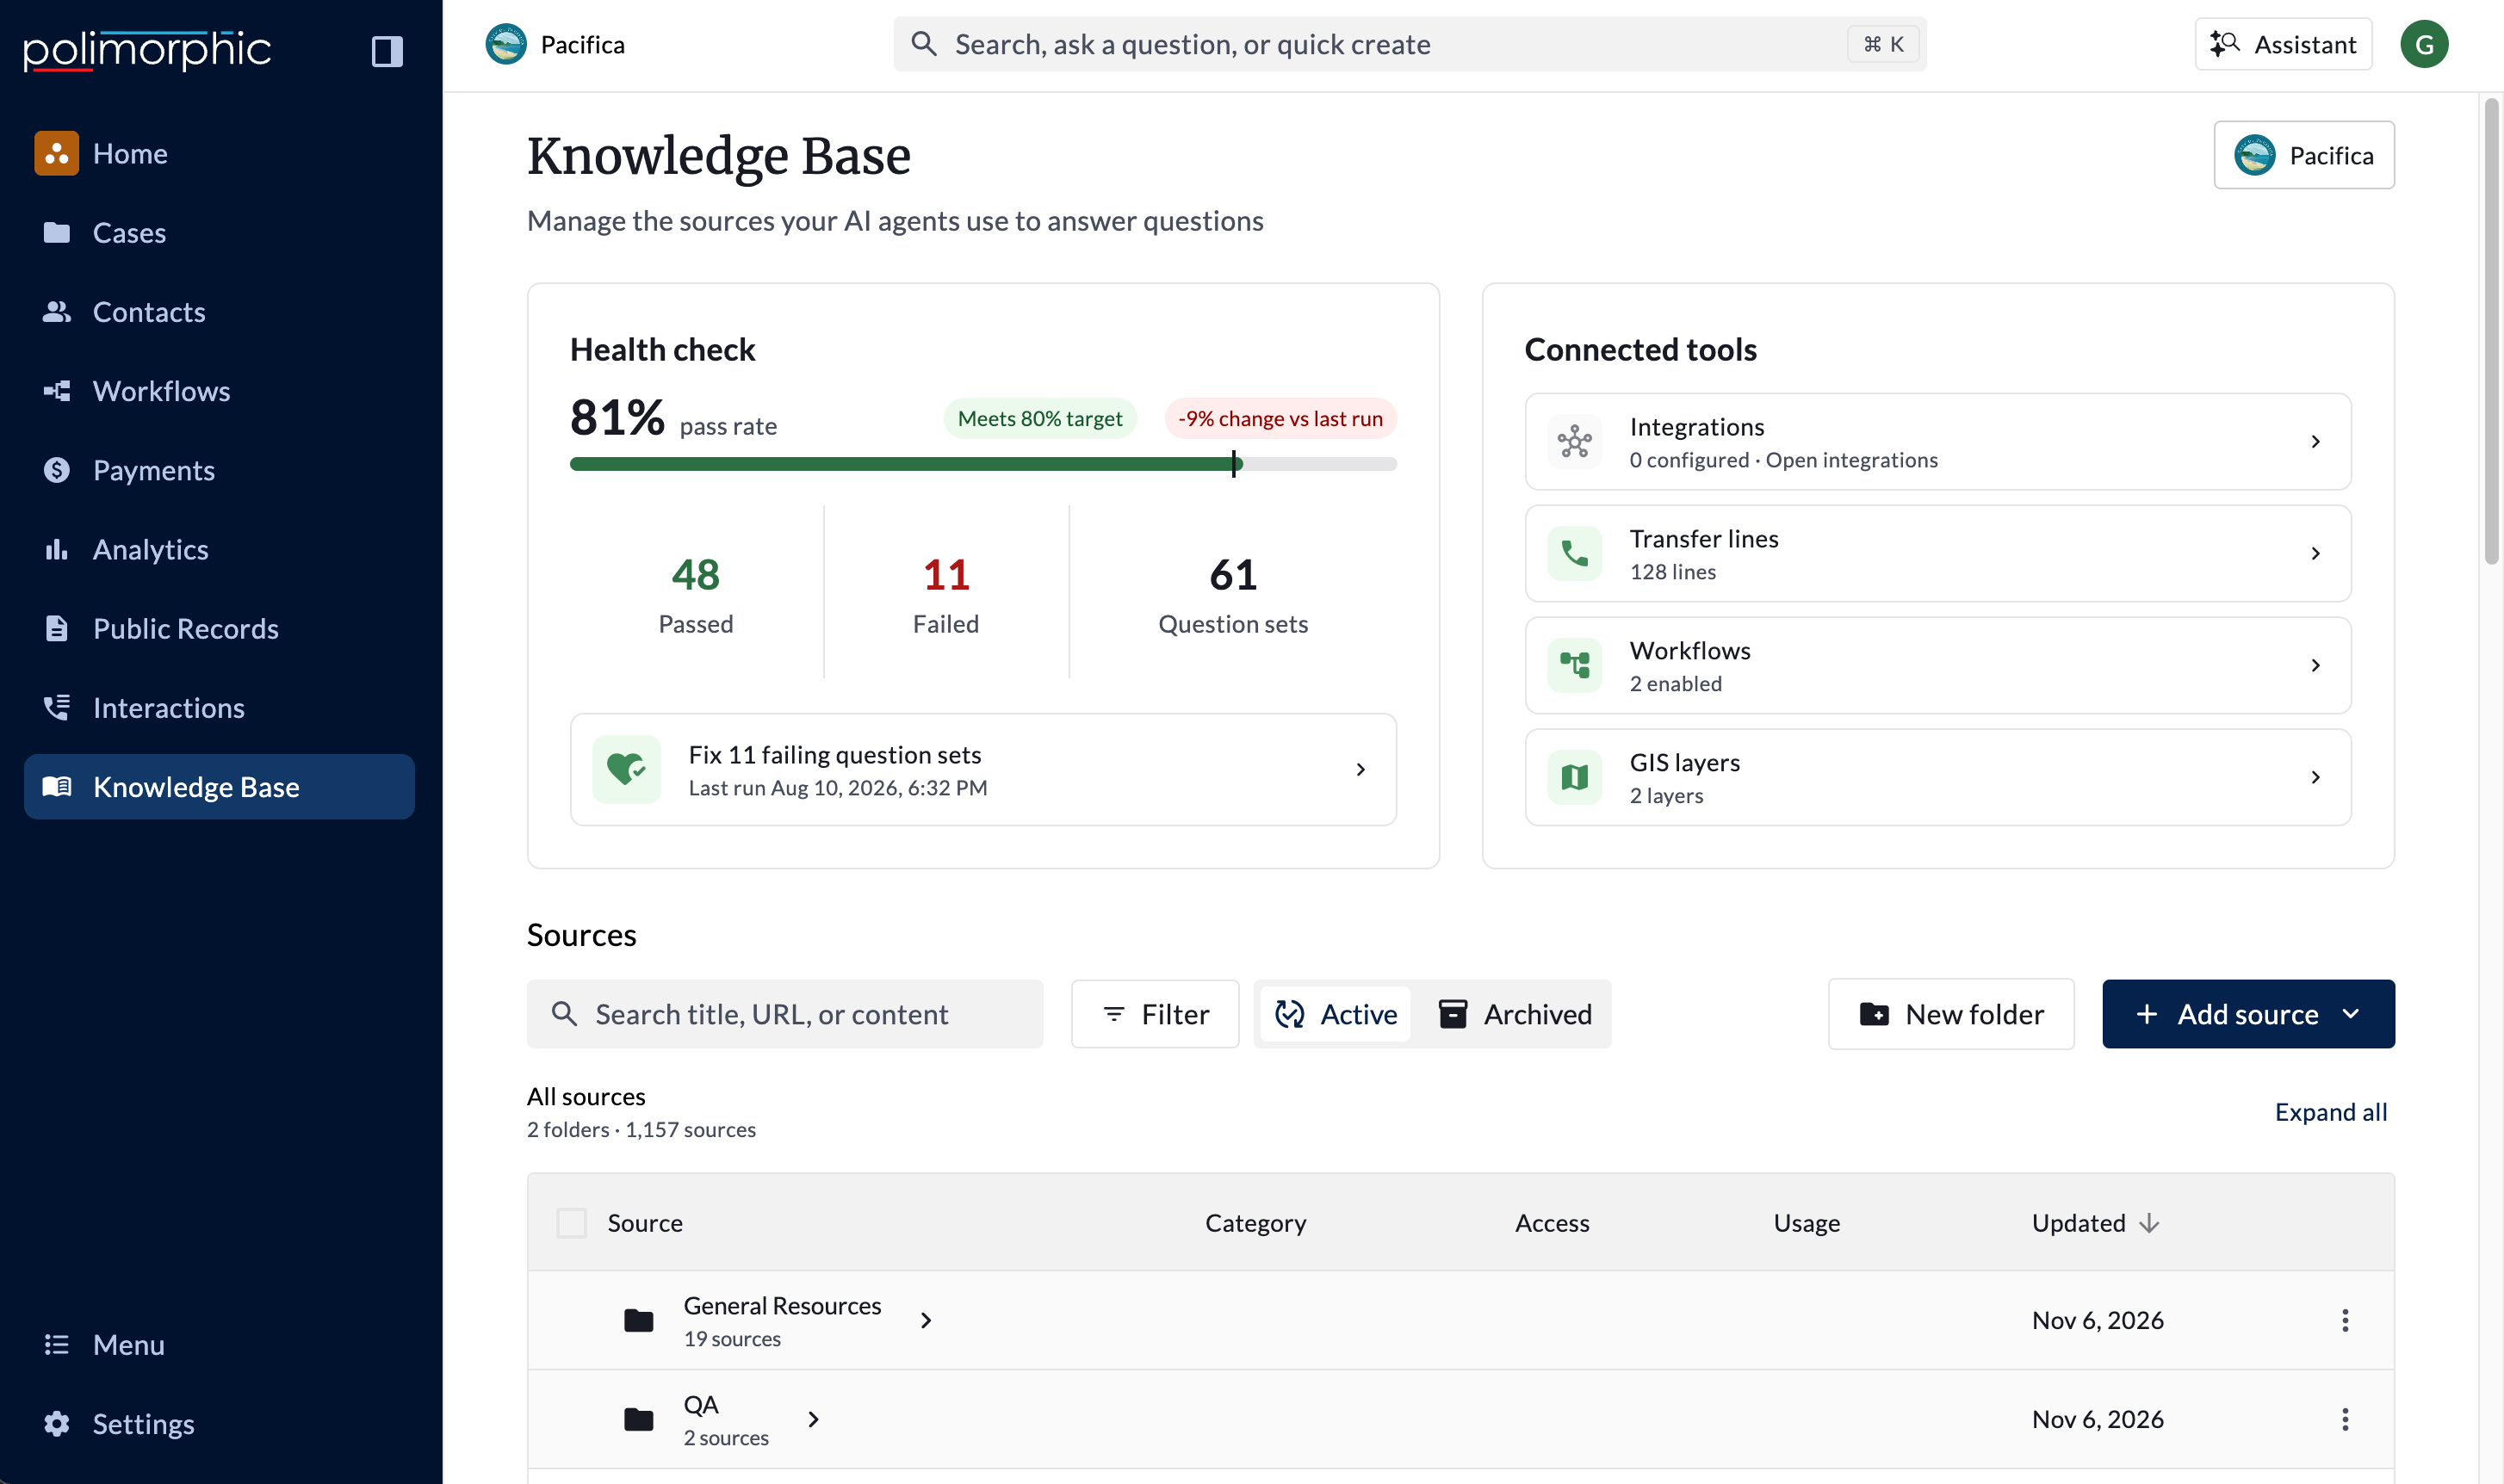
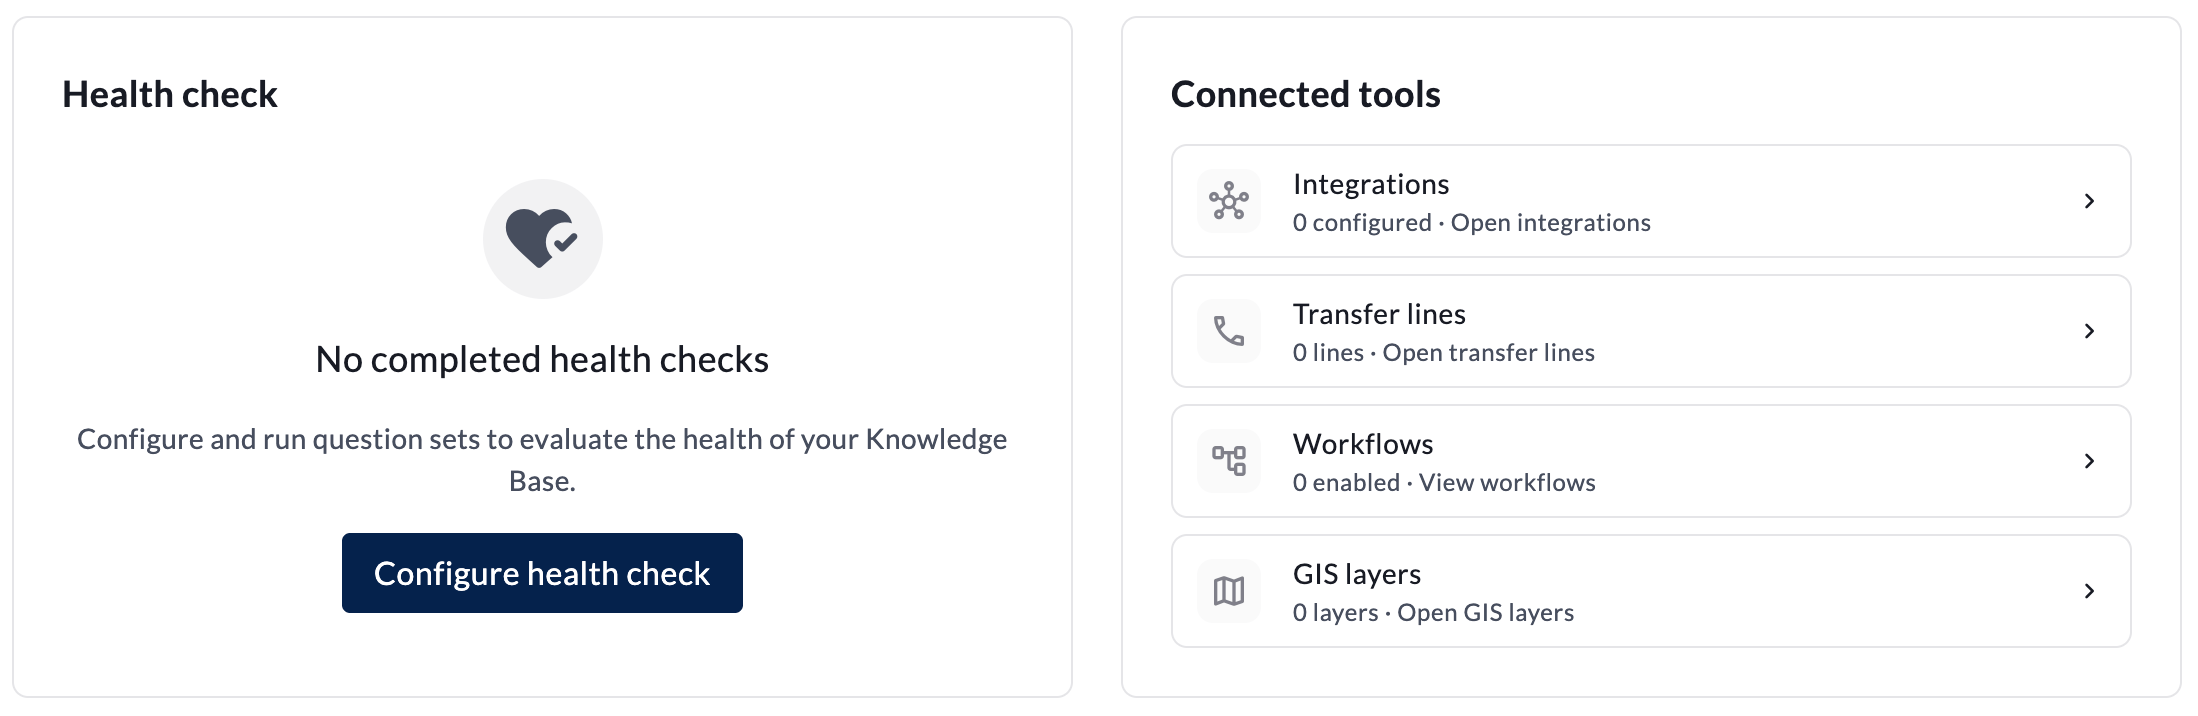
Health check
The Health check card summarizes the most recent run of your question sets, so you can see at a glance how well your AI is answering. Health check now lives inside the Knowledge Base instead of having its own item in the left-hand menu.- Pass rate shows the share of question sets that passed, with a bar and a chip that tells you whether it meets the target. If you’ve run the health check more than once, a second chip shows how much the pass rate changed since the previous run.
- Passed, Failed, and Question sets show the counts behind that pass rate.
- If any question sets failed, click Fix failing question sets (it shows how many failed) to go straight to them. Otherwise, click View the latest health check to review individual results.
- If you haven’t run a health check yet, click Configure health check to set up your first question sets.
Fix an answer from the health check
When you review results, a question your AI answered poorly shows an Add source button. Click it to add a Text source with the question and expected answer already filled in. Review the content, choose who can see it, and save. The next time someone asks that question, your AI will use your answer.Connected tools
Beyond written sources, your AI can use other tools to help residents. The Connected tools card lists each one with a quick count:- Integrations: connected systems your AI can look information up in.
- Transfer lines: the phone numbers your AI can send callers to.
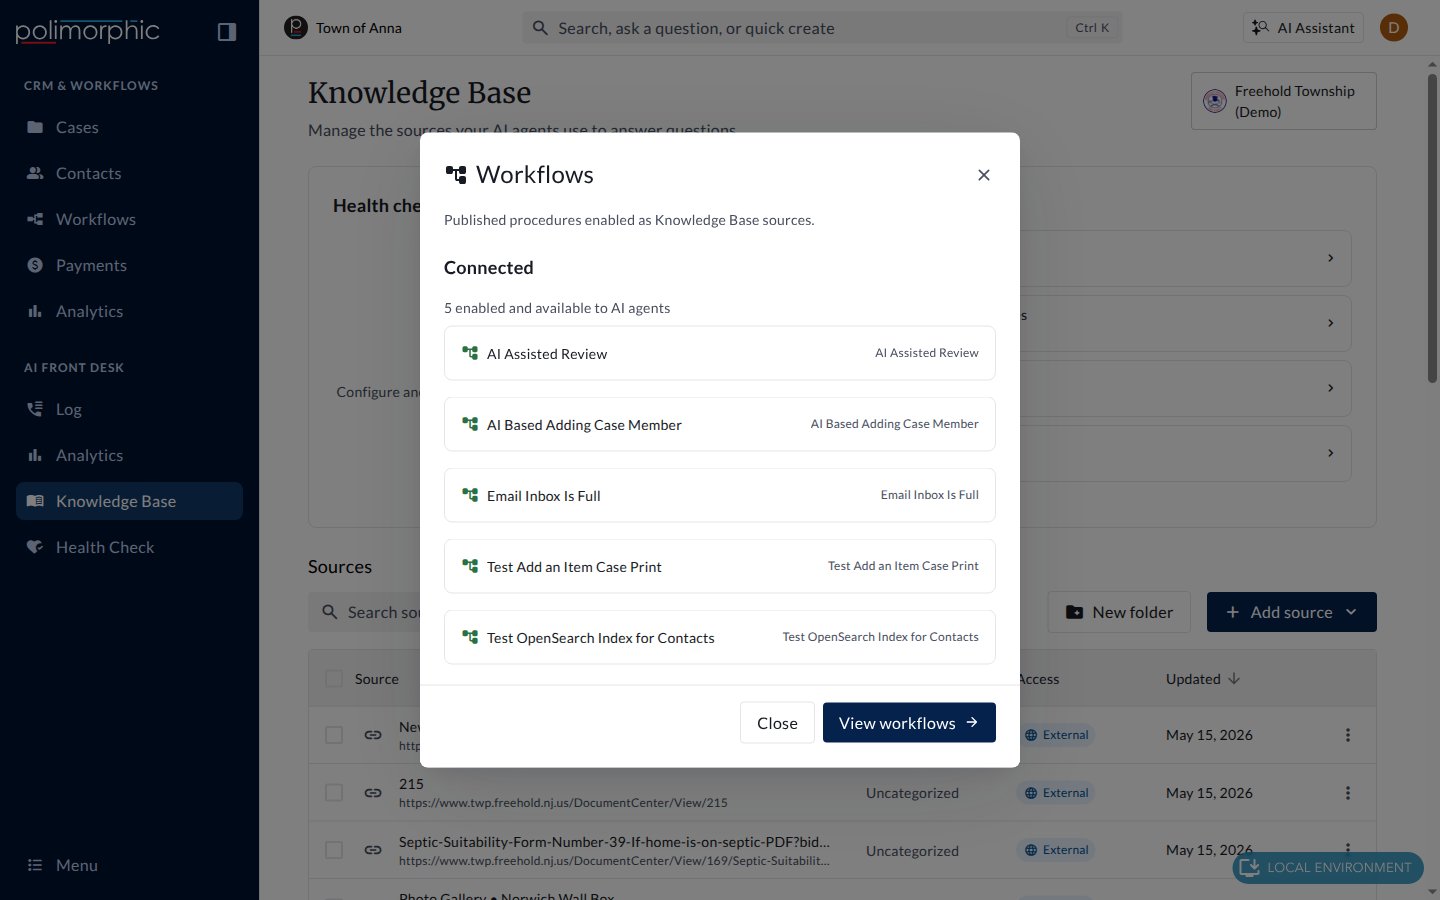
- Workflows: published workflows your AI can point residents to.
- GIS layers: map data your AI can use to answer location questions.
- Open integrations, Open transfer lines, and Open GIS layers take you to that page in Settings.
- View workflows opens the Workflows page, filtered to the workflows your AI can use.
Sources
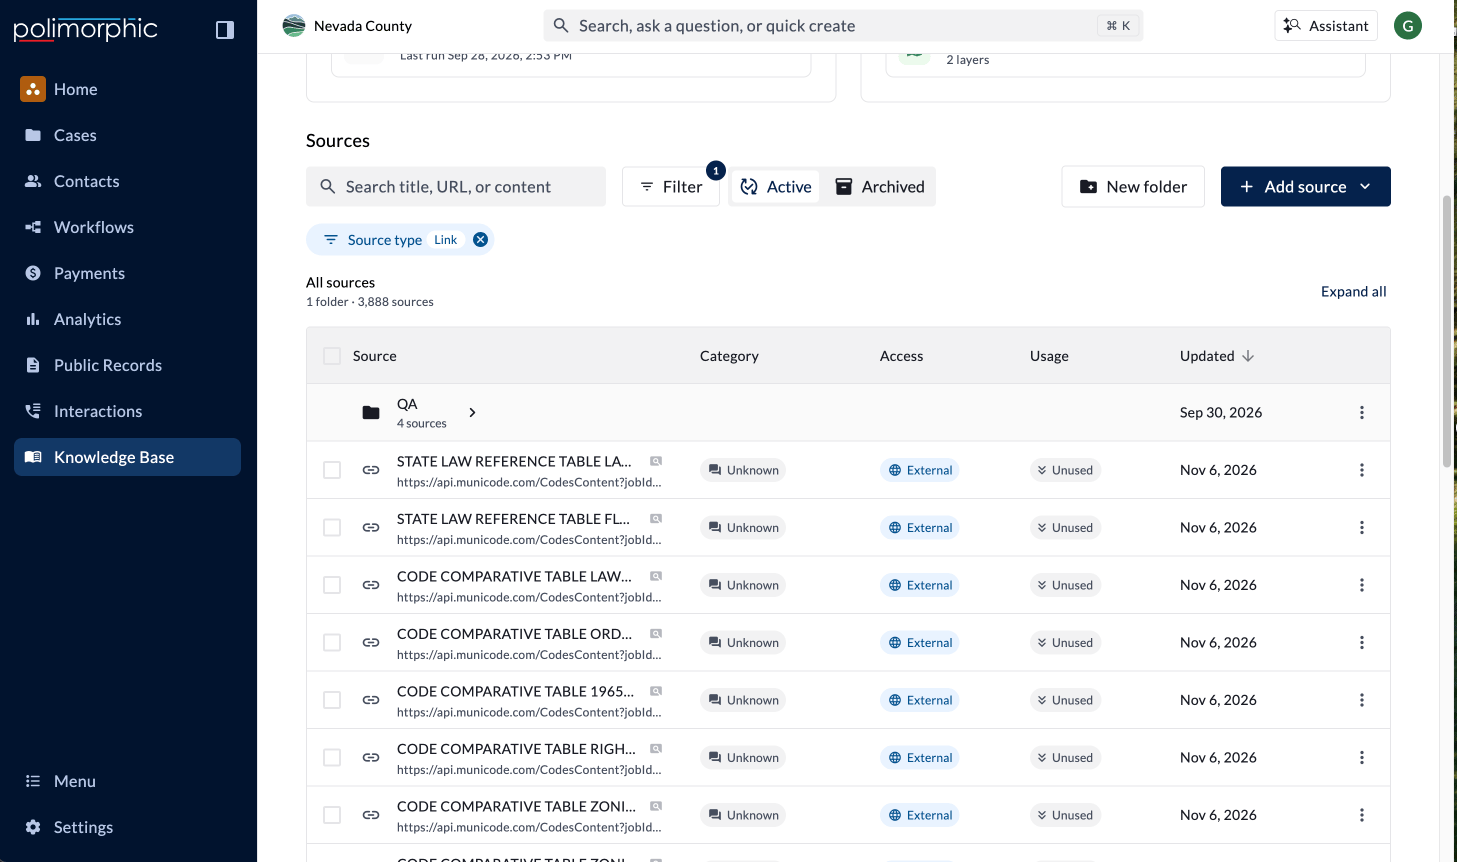
The Sources list contains everything your AI reads to answer questions, all in one place. Each row shows:- Source: the name and type (Link, Document, Text, or Domain).
- Category: the kind of page, such as Department, Calendar Event, or Job Posting. Text and domains don’t have a category.
- Access: External sources can be used to answer residents. Internal sources are for staff only.
- Usage: how often your AI has cited or referenced the source in conversations over the last 30 days, compared with your other sources: High, Above average, Average, Low, or Unused. Hover over it to see the number of conversations, a daily chart, and when it was last used. Click the column header to sort by usage.
- Updated: when the source was last refreshed.
Find a source
- Type in Search title, URL, or content to look for a source by its name, web address, or the text inside it.
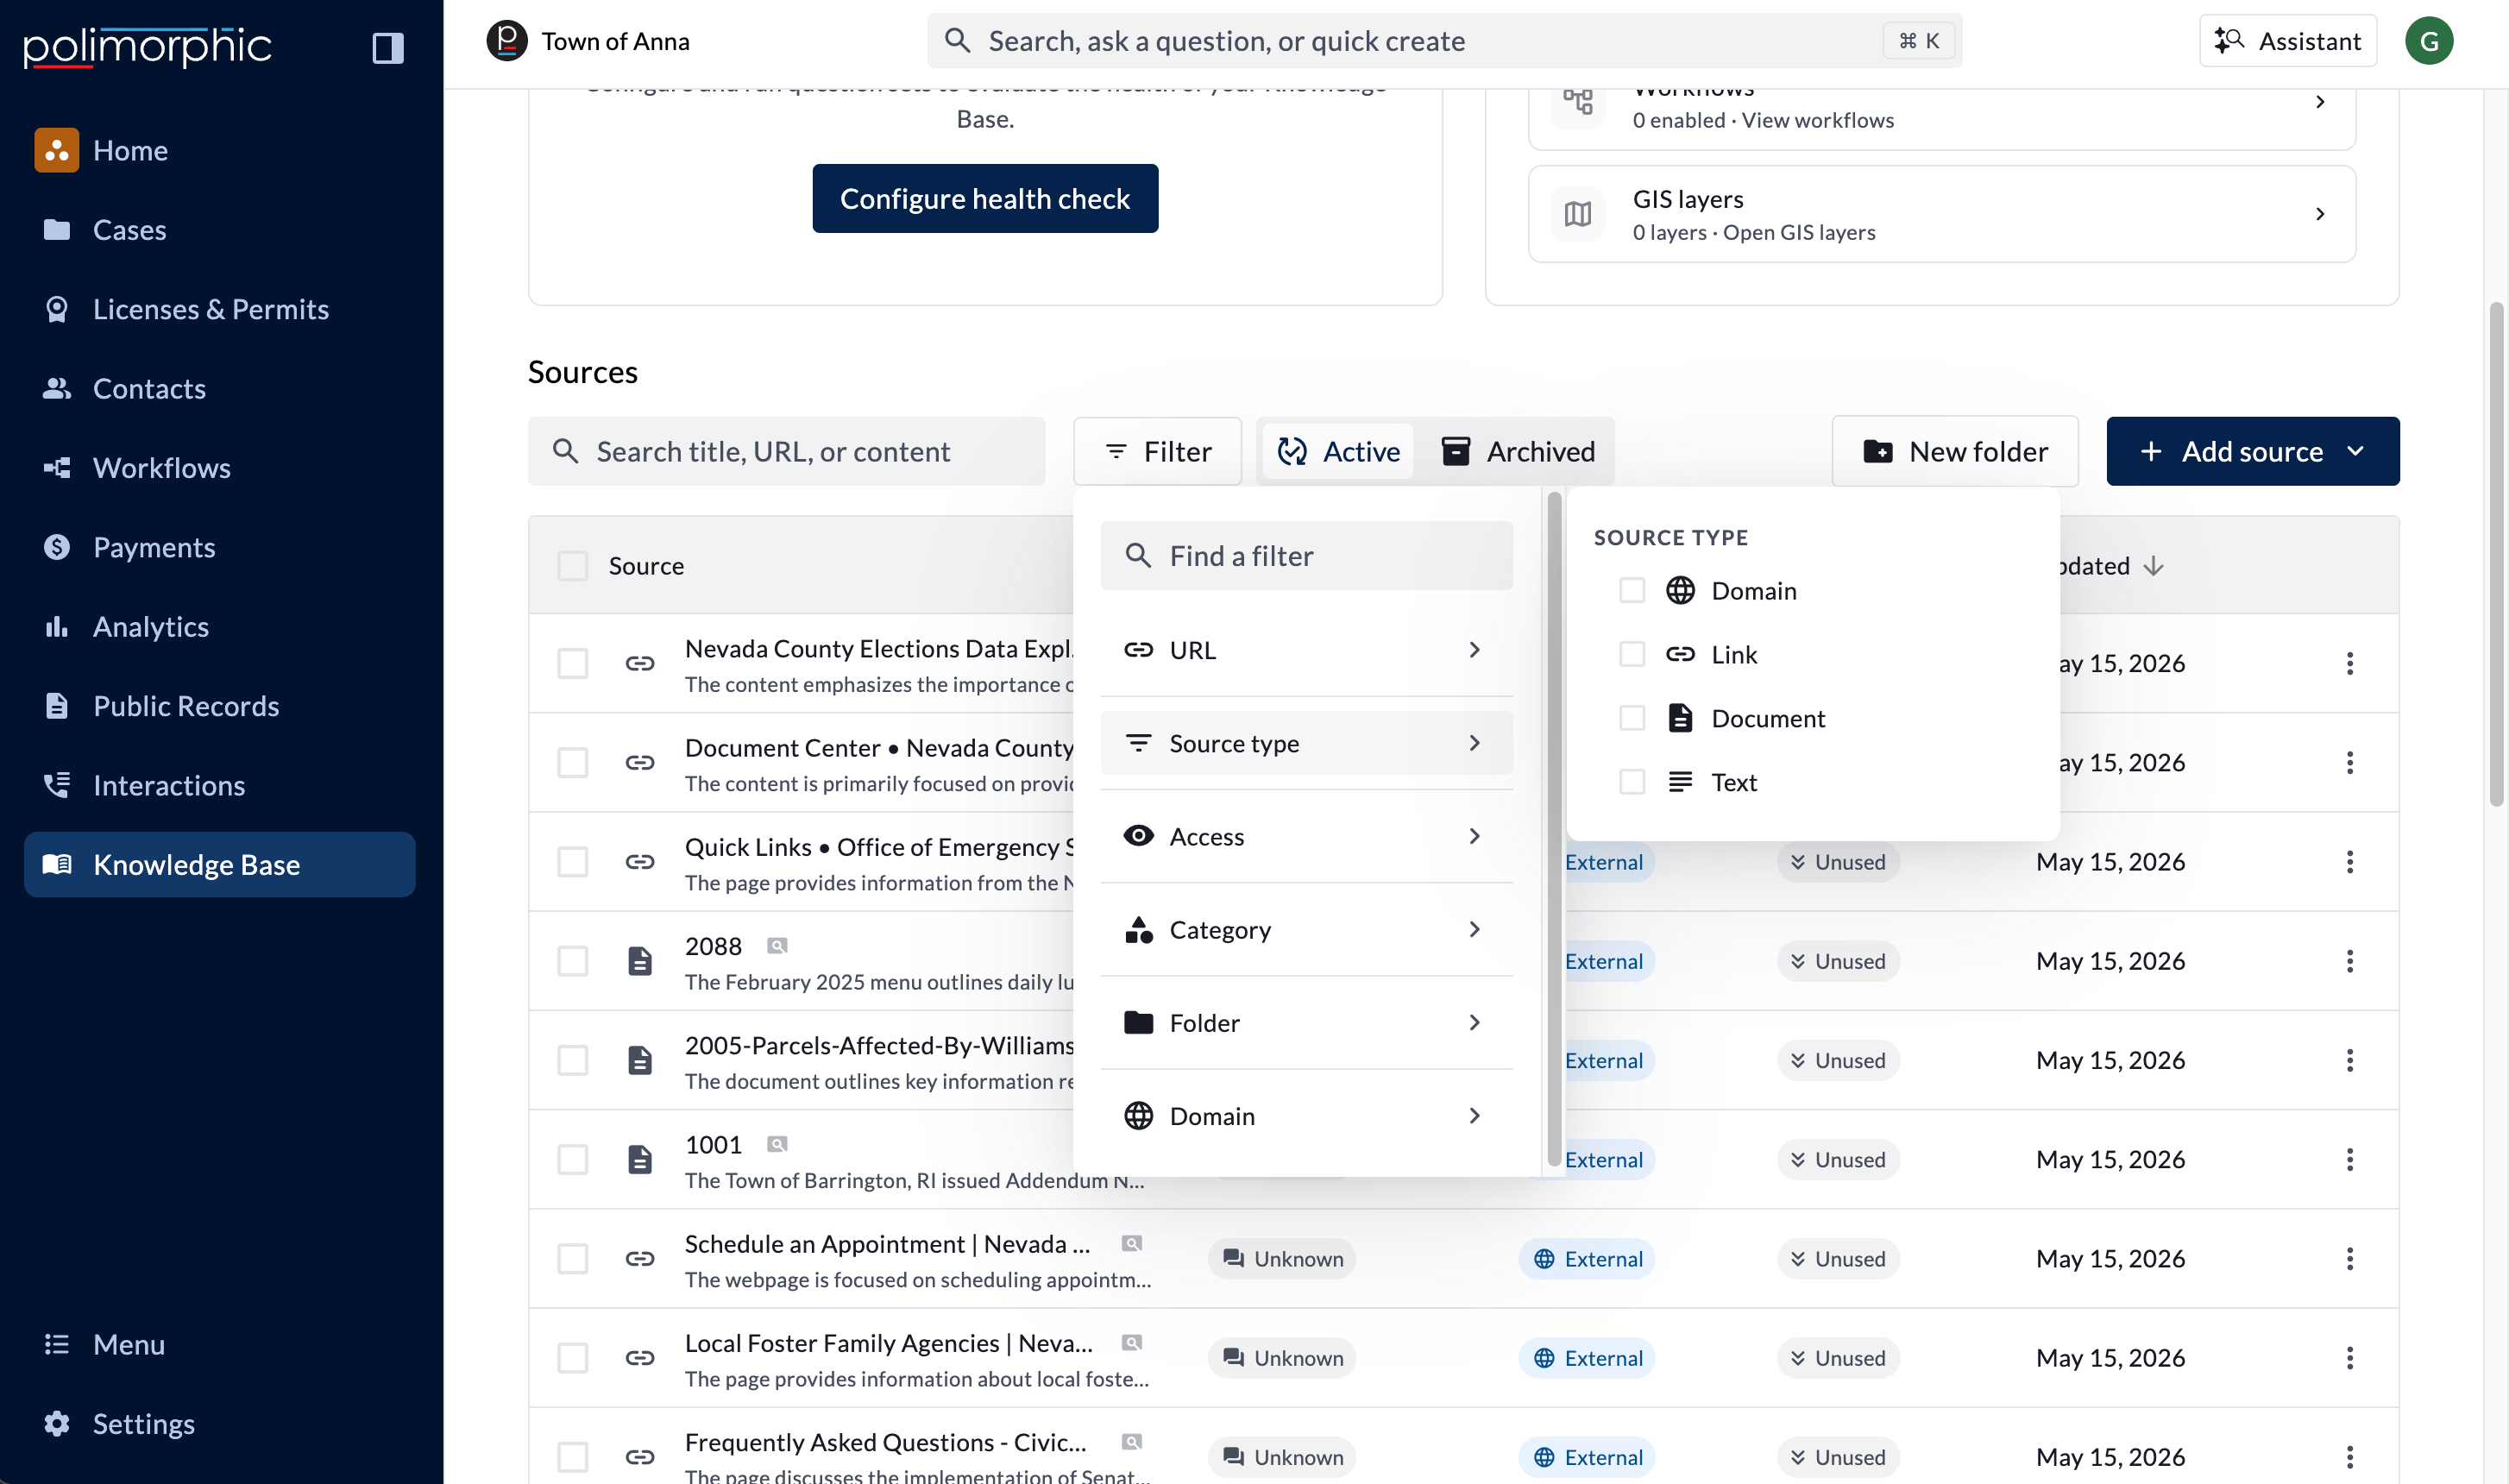
- Click Filter to narrow the list by URL, Source type, Access, Category, Folder, or Domain. Your active filters appear as chips below the search bar, and you can remove them one at a time or all at once.
- Use the Active / Archived toggle to switch between sources your AI is using and sources you’ve set aside.
Add a source
- Click Add source in the top-right corner of the Sources list.
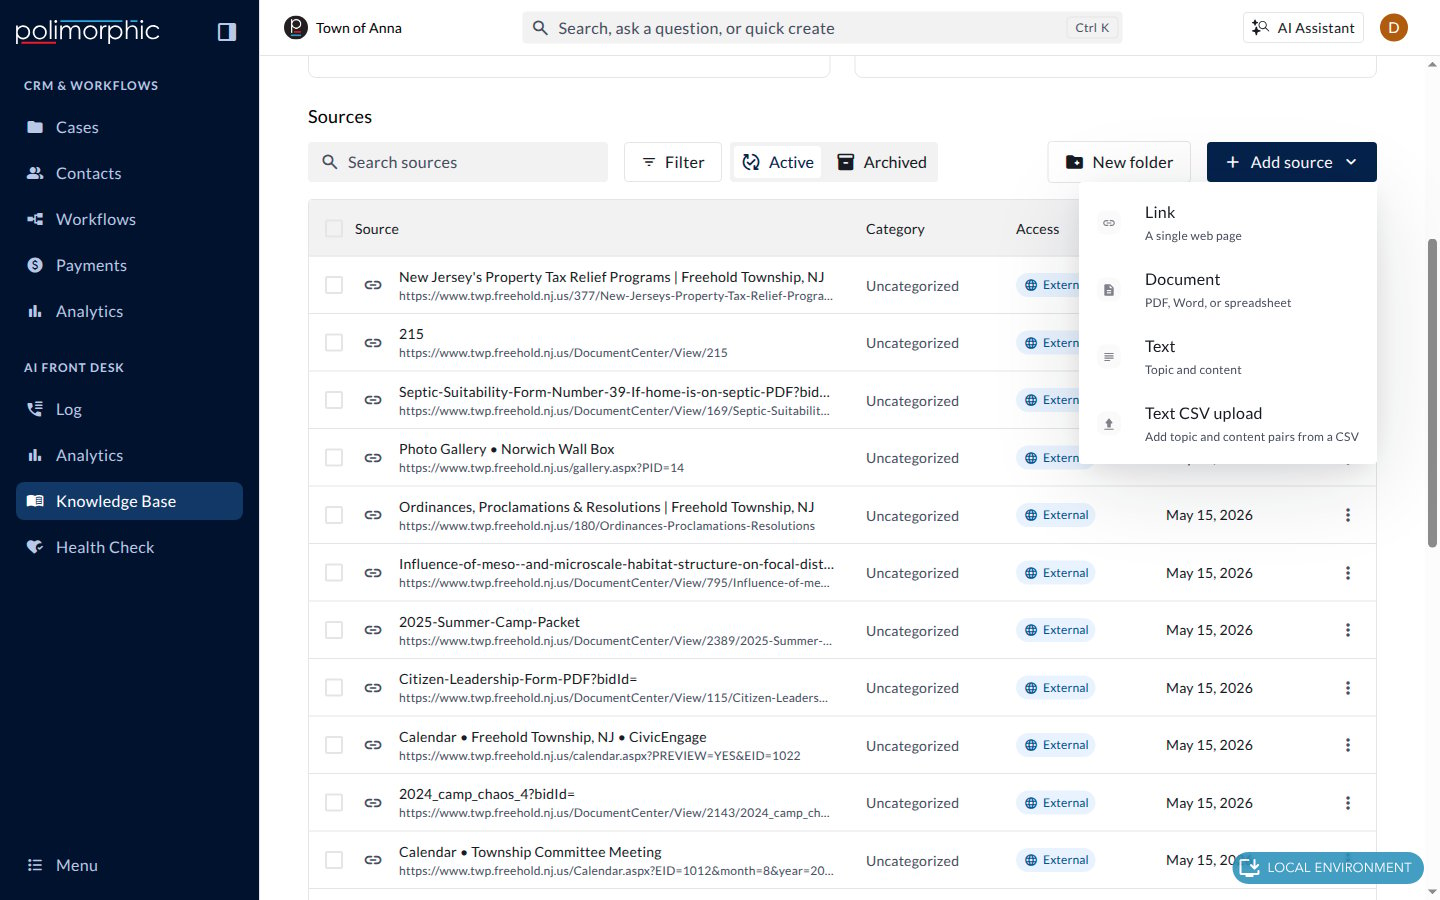
- Choose the kind of source you want to add:
- Link: one or more web pages. Each link must start with http:// or https://.
- Document: a file such as a PDF, Word document, PowerPoint, text file, or image.
- Text: a topic and its content, typed directly into Polimorphic. Use this for information that isn’t published anywhere else. When Text conflicts with a link or document, your AI uses the Text. To add several in a row, click Save and add another. (This was called FAQs in the previous design.)
- Text CSV upload: add many Text sources at once from a spreadsheet saved as a CSV. The file needs either Topic and Content columns, or Question and Answer columns.
- Choose who can see the source (Everyone or Staff only), then save.
Browse a domain
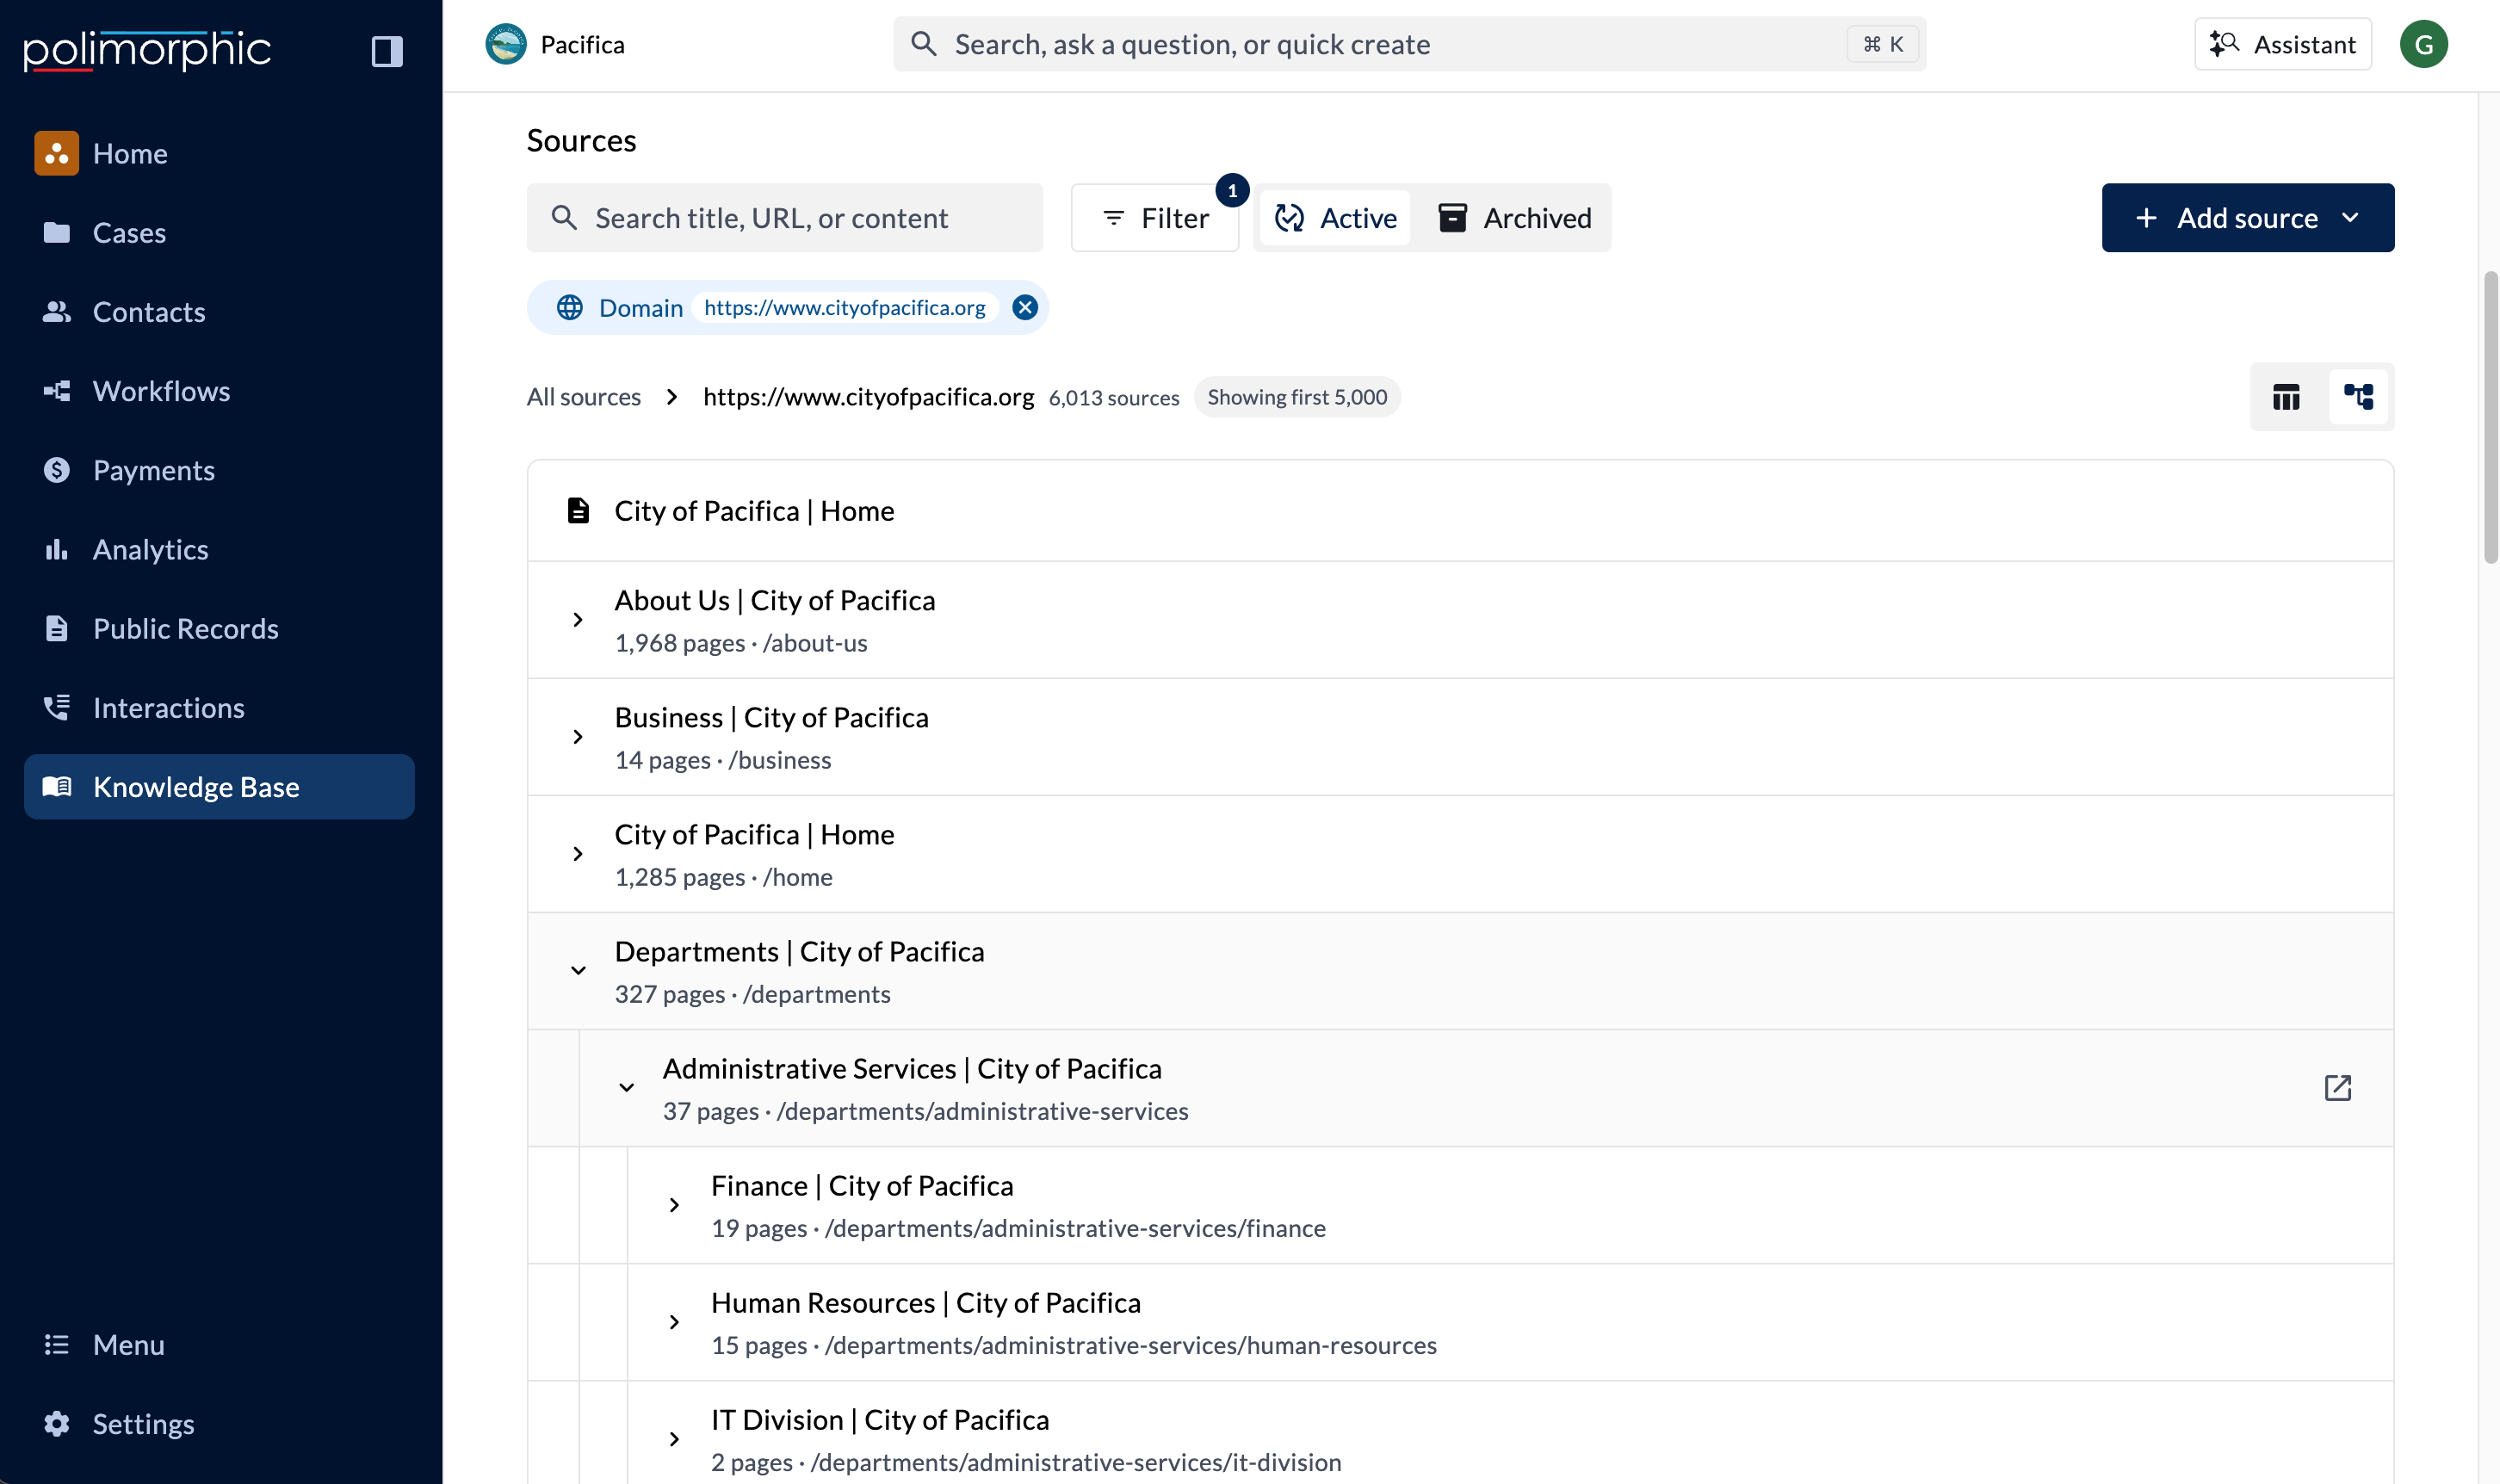
A domain is a website your AI reads page by page. Each domain row shows how many links it includes.- Click a domain to see only its links. Click All sources in the breadcrumb to go back.
- For many websites you can switch between Table view and Sitemap view to see the domain’s pages laid out the way the site is organized.
- Use the three-dot menu on a domain row and choose View history to see when the website was last read.
Organize sources into folders
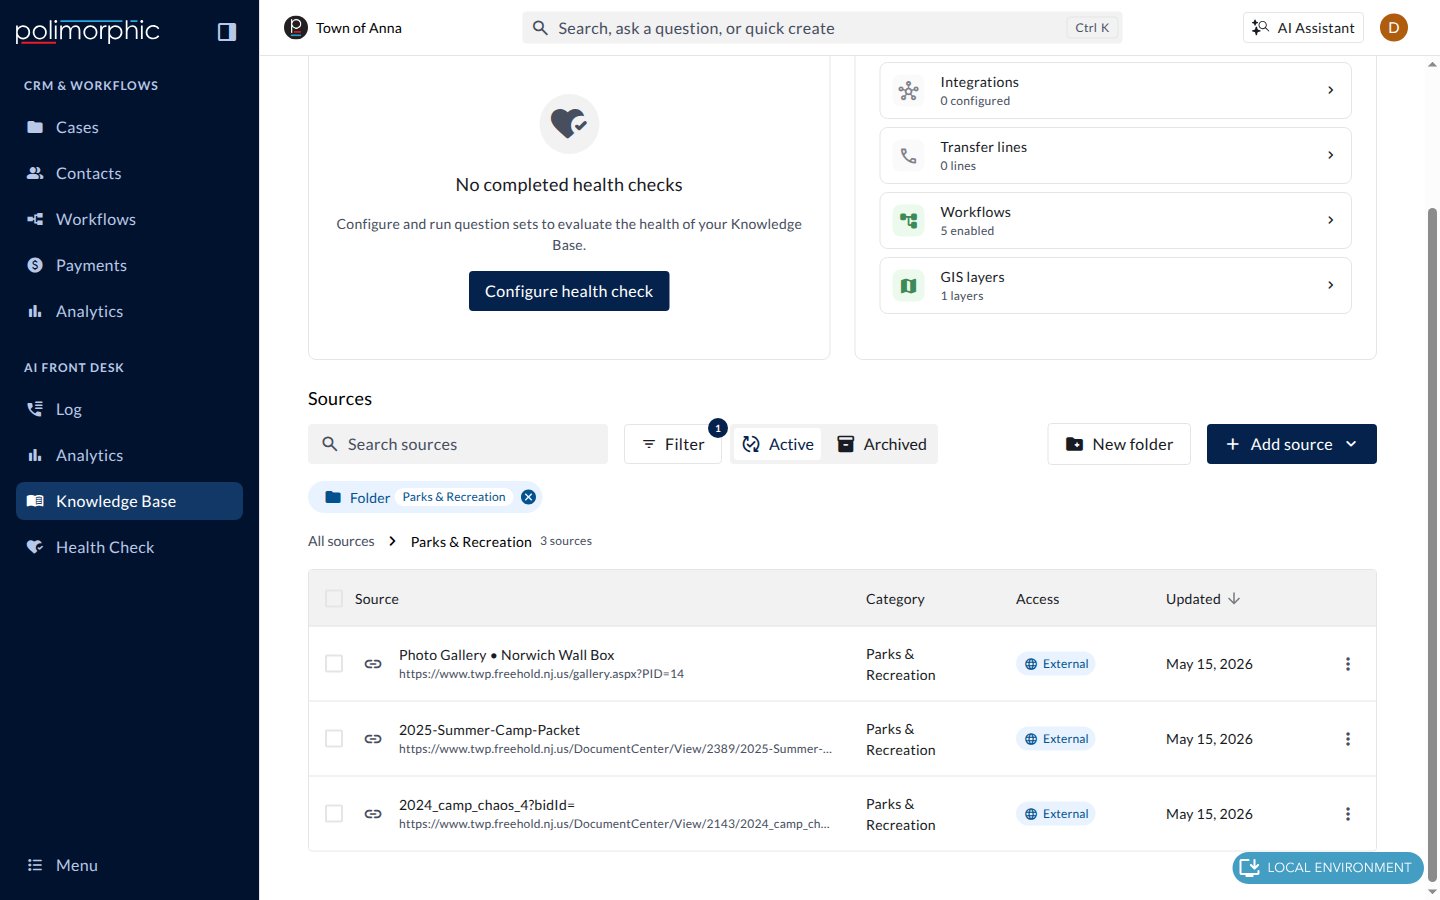
Folders keep related sources together, for example everything for one department or program. Links, documents, and Text can all go in folders.- Click New folder and give the folder a name.
- Use Expand all to see the sources inside every folder without leaving the list, and Collapse all to fold them back up.
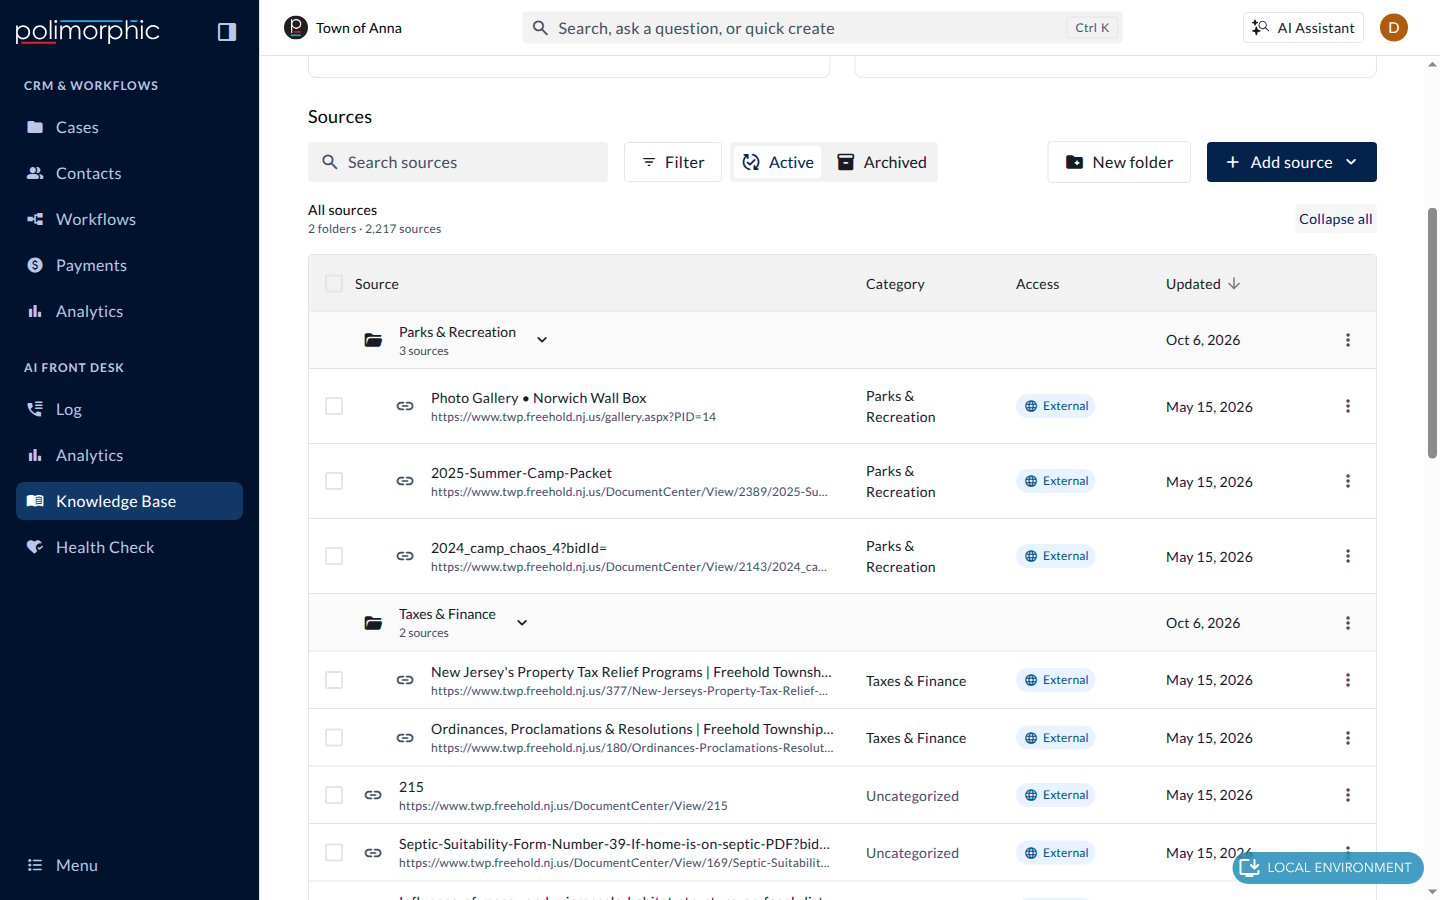
- Click a folder’s name to open it. Only that folder’s sources are shown, and a Folder filter chip appears above the list. Click All sources in the breadcrumb, or remove the chip, to go back.
- To put existing sources into a folder, select them and click Move selected, or open Edit source and choose a folder.
- To rename or delete a folder, use the three-dot menu on the folder’s row. Deleting a folder doesn’t delete its sources; they just stop being in that folder.
Edit a source
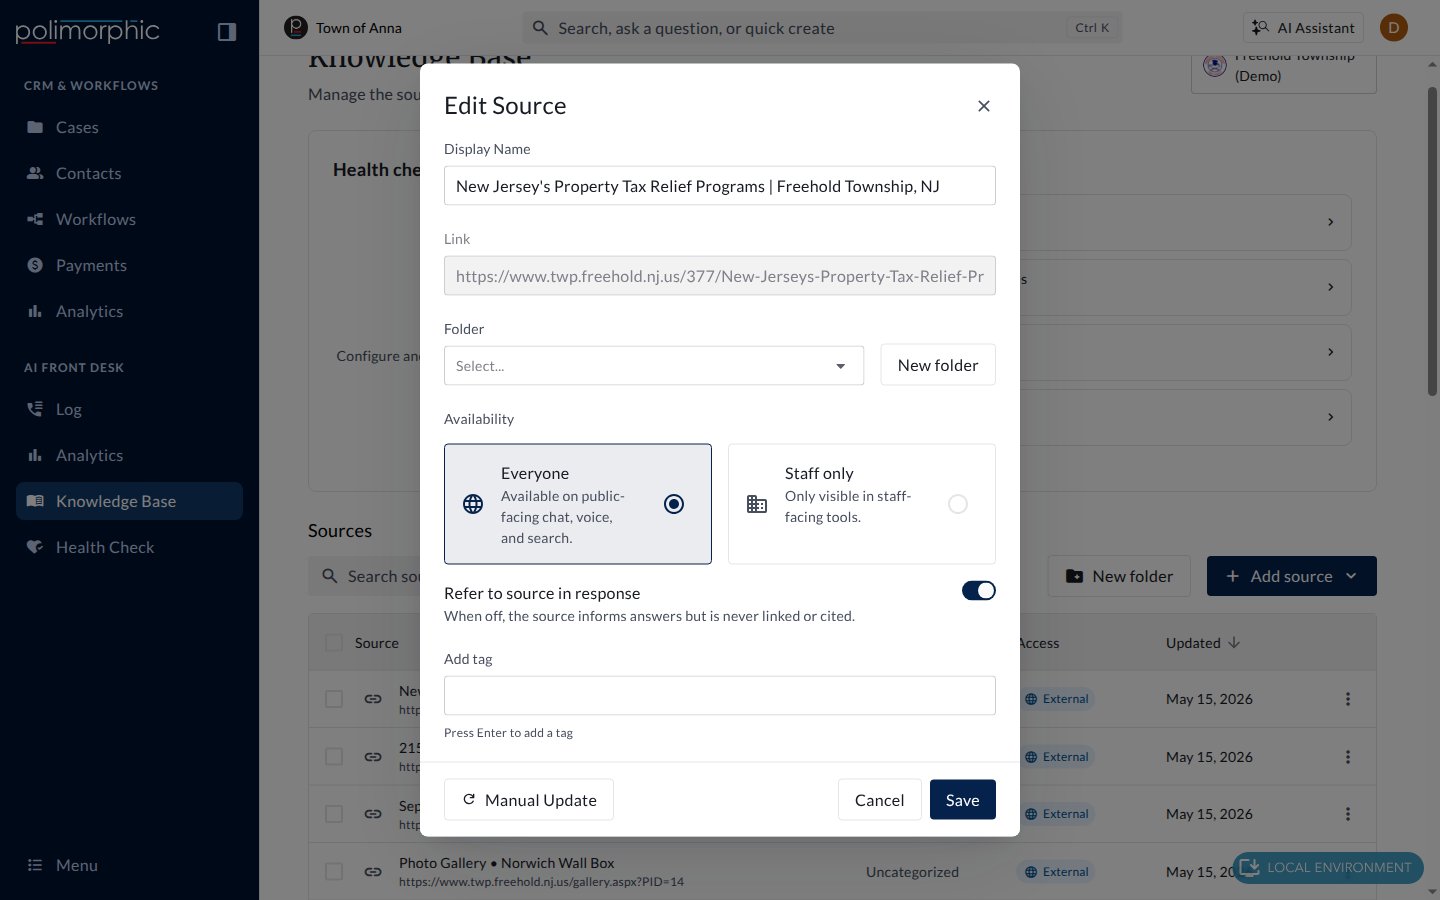
- Click the three-dot menu at the end of a row.
- Choose Edit source (or Edit Text for a Text source).
- From here you can:
- Change the Display Name.
- Move the source to a different Folder, or choose No folder.
- Set Availability to Everyone or Staff only.
- For sources available to Everyone, turn on Refer to source in response to let your AI link to the source in its answers. When it’s off, your AI still uses the source but won’t link to it.
- Add tags to help your AI prioritize the source. Press Enter after each tag.
- Click Save.
Archive, restore, delete, or move several sources at once
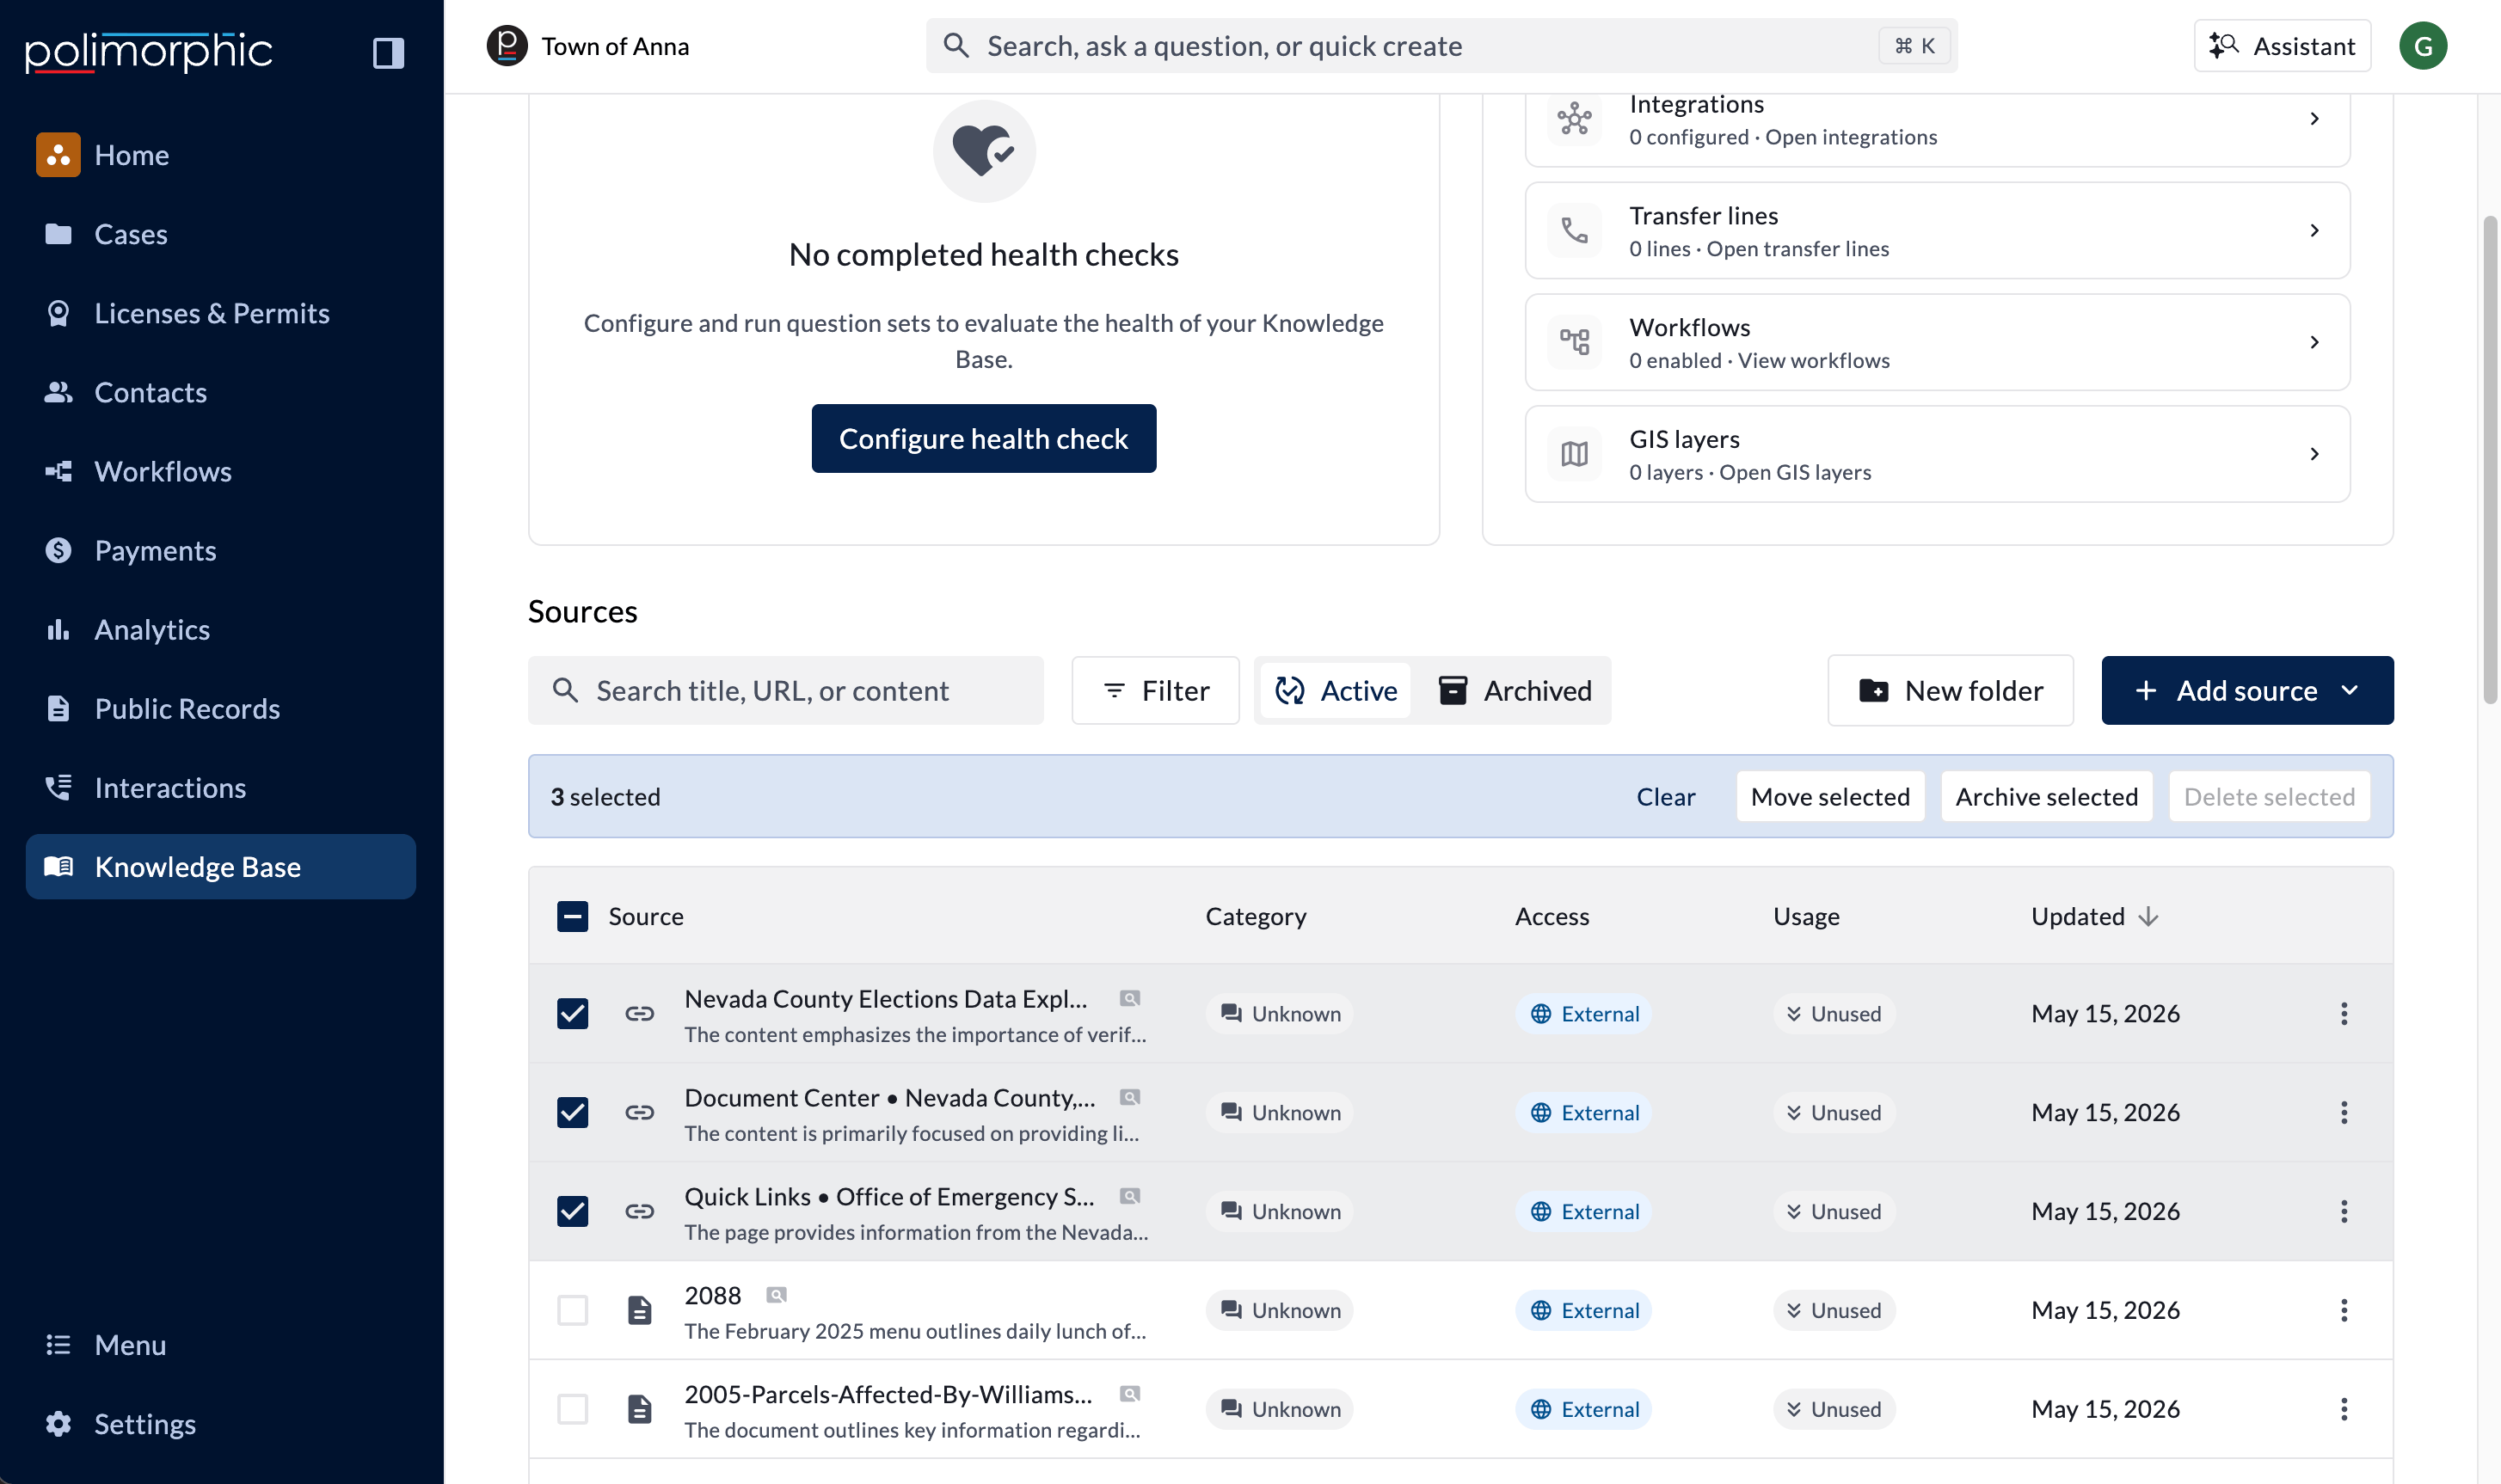
- Select the checkbox next to each source you want to change, or use the checkbox in the header to select the whole page.
- Choose an action from the bar above the list:
- Move selected puts links, documents, and Text in a folder.
- Archive selected stops your AI from using the selected links and documents. Text isn’t archived; if your selection includes Text, it’s skipped.
- Delete selected permanently deletes the selected Text sources. Links and documents are never deleted this way.
- To bring archived sources back, switch to Archived, select them, and click Restore selected.
What’s changed from the previous Knowledge Base
- The separate Links, Domains, Documents, and FAQs tabs are combined into one Sources list. Use the Source type filter to see one kind at a time.
- FAQs are now called Text, and Text can now go in folders.
- Integrations, transfer lines, workflows, and GIS layers are now under Connected tools.
- Health check results appear right on the Knowledge Base page, and Health check no longer has its own item in the left-hand menu.
- A new Usage column shows which sources your AI relies on most.